authentik on Kubernetes
authentik1 is an open-source Identity Provider, focused on flexibility and versatility. With authentik, site administrators, application developers, and security engineers have a dependable and secure solution for authentication in almost any type of environment.
There are robust recovery actions available for the users and applications, including user profile and password management. You can quickly edit, deactivate, or even impersonate a user profile, and set a new password for new users or reset an existing password.
You can use authentik in an existing environment to add support for new protocols, so introducing authentik to your current tech stack doesn't present re-architecting challenges. We already support all of the major providers, such as OAuth2, SAML, LDAP  , and SCIM, so you can pick the protocol that you need for each application.
See a comparison with other IDPs here.
authentik requirements
Ingredients
Already deployed:
- A Kubernetes cluster
- Flux deployment process bootstrapped
- An Ingress controller to route incoming traffic to services
- Persistent storage to store persistent stuff
Optional:
- External DNS to create an DNS entry the "flux" way
Preparation
authentik Namespace
We need a namespace to deploy our HelmRelease and associated YAMLs into. Per the flux design, I create this example yaml in my flux repo at /bootstrap/namespaces/namespace-authentik.yaml:
apiVersion: v1
kind: Namespace
metadata:
  name: authentik
authentik HelmRepository
We're going to install the authentik helm chart from the authentik repository, so I create the following in my flux repo (assuming it doesn't already exist):
apiVersion: source.toolkit.fluxcd.io/v1beta1
kind: HelmRepository
metadata:
  name: authentik
  namespace: flux-system
spec:
  interval: 15m
  url: https://charts.goauthentik.io/
authentik Kustomization
Now that the "global" elements of this deployment (just the HelmRepository in this case) have been defined, we do some "flux-ception", and go one layer deeper, adding another Kustomization, telling flux to deploy any YAMLs found in the repo at /authentik/. I create this example Kustomization in my flux repo:
apiVersion: kustomize.toolkit.fluxcd.io/v1beta2
kind: Kustomization
metadata:
  name: authentik
  namespace: flux-system
spec:
  interval: 30m
  path: ./authentik
  prune: true # remove any elements later removed from the above path
  timeout: 10m # if not set, this defaults to interval duration, which is 1h
  sourceRef:
    kind: GitRepository
    name: flux-system
  healthChecks:
    - apiVersion: helm.toolkit.fluxcd.io/v2beta1
      kind: HelmRelease
      name: authentik
      namespace: authentik
Fast-track your fluxing! 🚀
Is crafting all these YAMLs by hand too much of a PITA?
"Premix" is a git repository, which includes an ansible playbook to auto-create all the necessary files in your flux repository, for each chosen recipe!
Let the machines do the TOIL! 
authentik DNSEndpoint
If, like me, you prefer to create your DNS records the "GitOps way" using ExternalDNS, create something like the following example to create a DNS entry for your Authentik ingress:
apiVersion: externaldns.k8s.io/v1alpha1
kind: DNSEndpoint
metadata:
  name: "authentik.example.com"
  namespace: authentik
spec:
  endpoints:
  - dnsName: "authentik.example.com"
    recordTTL: 180
    recordType: CNAME
    targets:
    - "traefik-ingress.example.com"
Tip
Rather than creating individual A records for each host, I prefer to create one A record (nginx-ingress.example.com in the example above), and then create individual CNAME records pointing to that A record.
authentik HelmRelease
Lastly, having set the scene above, we define the HelmRelease which will actually deploy authentik into the cluster. We start with a basic HelmRelease YAML, like this example:
apiVersion: helm.toolkit.fluxcd.io/v2beta1
kind: HelmRelease
metadata:
  name: authentik
  namespace: authentik
spec:
  chart:
    spec:
      chart: authentik
      version: 2023.10.x # auto-update to semver bugfixes only
      sourceRef:
        kind: HelmRepository
        name: authentik
        namespace: flux-system
  interval: 15m
  timeout: 5m
  releaseName: authentik
  values: # paste contents of upstream values.yaml below, indented 4 spaces
If we deploy this helmrelease as-is, we'll inherit every default from the upstream authentik helm chart. That's probably hardly ever what we want to do, so my preference is to take the entire contents of the authentik helm chart's values.yaml, and to paste these (indented), under the values key. This means that I can then make my own changes in the context of the entire values.yaml, rather than cherry-picking just the items I want to change, to make future chart upgrades simpler.
Why not put values in a separate ConfigMap?
Didn't you previously advise to put helm chart values into a separate ConfigMap?
Yes, I did. And in practice, I've changed my mind.
Why? Because having the helm values directly in the HelmRelease offers the following advantages:
- If you use the YAML extension in VSCode, you'll see a full path to the YAML elements, which can make grokking complex charts easier.
- When flux detects a change to a value in a HelmRelease, this forces an immediate reconciliation of the HelmRelease, as opposed to the ConfigMap solution, which requires waiting on the next scheduled reconciliation.
- Renovate can parse HelmRelease YAMLs and create PRs when they contain docker image references which can be updated.
- In practice, adapting a HelmRelease to match upstream chart changes is no different to adapting a ConfigMap, and so there's no real benefit to splitting the chart values into a separate ConfigMap, IMO.
Then work your way through the values you pasted, and change any which are specific to your configuration.
Configure authentik Helm Chart
The following sections detail suggested changes to the values pasted into /authentik/helmrelease-authentik.yaml from the authentik helm chart's values.yaml. The values are already indented correctly to be copied, pasted into the HelmRelease, and adjusted as necessary.
Tip
Confusingly, the authentik helm chart defaults to having the bundled redis and postgresql disabled, but the authentik Kubernetes install docs require that they be enabled. Take care to change the respective enabled: false values to enabled: true below.
Set authentik secret key
Authentik needs a secret key for signing cookies (not singing for cookies!  ), so set it below, and don't change it later (or feed it after midnight!):
    authentik:
      # -- Log level for server and worker
      log_level: info
      # -- Secret key used for cookie singing and unique user IDs,
      # don't change this after the first install
      secret_key: "ilovesingingcookies"
Set bootstrap credentials
By default, when you install the authentik helm chart, you'll get to set your admin user's (akadmin) when you first login. You can pre-configure this password by setting the AUTHENTIK_BOOTSTRAP_PASSWORD env var as illustrated below.
If you're after a more hands-off implementation, you can also pre-set a "bootstrap token", which can be used to interact with the authentik API programatically (see example below):
    env:
      AUTHENTIK_BOOTSTRAP_PASSWORD: "iamusedbyhumanz"
      AUTHENTIK_BOOTSTRAP_TOKEN: "iamusedbymachinez"
Configure Redis for authentik
authentik uses Redis as the broker for Celery background tasks. The authentik helm chart defaults to provisioning an 8Gi PVC for redis, which seems like overkill for a simple broker. You can tweak the size of the Redis PVC by setting:
    redis:
      master:
        persistence:
          size: 1Gi
Configure PostgreSQL for authentik
Although technically you can leave the PostgreSQL password blank, authentik-server will just error with an error like fe_sendauth: no password supplied, so ensure you set the password, both in authentik.postgresql.password and in postgresql.postgresqlPassword:
At the very least, you'll want to set the following
    authentik:
      postgresql:
        password: "Iamaverysecretpassword"

    postgresql:
      postgresqlPassword: "Iamaverysecretpassword"
As with Redis above, you may feel (like I do) that provisioning an 8Gi PVC for a database containing 1 user and a handful of app configs is overkill. You can adjust the size of the PostgreSQL PVC by setting:
    postgresql:
      persistence:
        size: 1Gi
Ingress
Setup your ingress for the authentik UI. If you plan to add outposts to proxy other un-authenticated endpoints later, this is where you'll add them:
    ingress:
      enabled: true
      ingressClassName: "nginx"
      annotations: {}
      labels: {}
      hosts:
        - host: authentik.example.com
          paths:
            - path: "/"
              pathType: Prefix
      tls: []
Install authentik!
Commit the changes to your flux repository, and either wait for the reconciliation interval, or force a reconcilliation using flux reconcile source git flux-system. You should see the kustomization appear...
~ ❯ flux get kustomizations authentik
NAME        READY   MESSAGE                         REVISION        SUSPENDED
authentik   True    Applied revision: main/70da637  main/70da637    False
~ ❯
The helmrelease should be reconciled...
~ ❯ flux get helmreleases -n authentik authentik
NAME        READY   MESSAGE                             REVISION    SUSPENDED
authentik   True    Release reconciliation succeeded    v2023.10.x      False
~ ❯
And you should have happy pods in the authentik namespace:
~ ❯ k get pods -n authentik
NAME                                READY   STATUS      RESTARTS        AGE
authentik-redis-master-0            1/1     Running     1 (3d17h ago)   26d
authentik-server-548c6d4d5f-ljqft   1/1     Running     1 (3d17h ago)   20d
authentik-postgresql-0              1/1     Running     1 (3d17h ago)   26d
authentik-worker-7bb8f55bcb-5jwrr   1/1     Running     0               23h
~ ❯
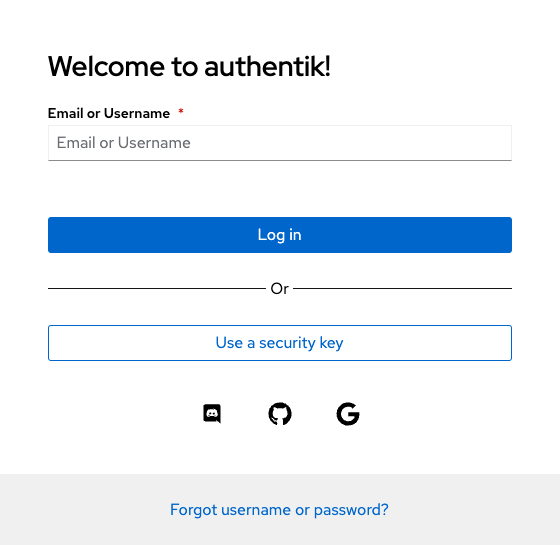
Browse to the URL you configured in your ingress above, and confirm that the authentik UI is displayed.
Create your admin user
You may be a little confused re how to login for the first time. If you didn't use a bootstrap password as above, you'll want to go to https://<ingress-host-name>/if/flow/initial-setup/, and set an initial password for your akadmin user.
Now store the akadmin password somewhere safely, and proceed to create your own user account (you'll presumably want to use your own username and email address).
Navigate to Admin Interface → Directory → Users, and create your new user. Edit your user and manually set your password.
Next, navigate to Directory → Groups, and edit the authentik Admins group. Within the group, click the Users tab to add your new user to the authentik Admins group.
Eureka! 
Your user is now an authentik superuser. Confirm this by logging out as akadmin, and logging back in with your own credentials.
Summary
What have we achieved? We've got authentik running and accessible, we've created a superuser account, and we're ready to flex  the power of authentik to deploy an OIDC provider for Kubernetes, or simply secure unprotected UIs with proxy outposts!
Summary
Created:
- authentik running and ready to "authentikate"
 !
!
Next:
- Configure Kubernetes OIDC authentication, unlocking production readiness as well as the Kubernetes Dashboard and Weave GitOps UIs (coming soon)
Chef's notes 📓
-
Yes, the lower-case thing bothers me too. That's how the official docs do it though, so I'm following suit. ↩
Tip your waiter (sponsor) 👏
Did you receive excellent service? Want to compliment the chef? (..and support development of current and future recipes!) Sponsor me on Github / Ko-Fi / Patreon, or see the contribute page for more (free or paid) ways to say thank you! 👏
Employ your chef (engage) 🤝
Is this too much of a geeky PITA? Do you just want results, stat? I do this for a living - I'm a full-time Kubernetes contractor, providing consulting and engineering expertise to businesses needing short-term, short-notice support in the cloud-native space, including AWS/Azure/GKE, Kubernetes, CI/CD and automation.
Learn more about working with me here.
Flirt with waiter (subscribe) 💌
Want to know now when this recipe gets updated, or when future recipes are added? Subscribe to the RSS feed, or leave your email address below, and we'll keep you updated.