Get started with your Open Source contribution
Spread the word ❤️
Got nothing to contribute, but want to give back to the community? Here are some ideas:
- Star
 the repo
 - Tweet
 the meat, or toot
  the loot!
 - Send a testimonial
Contributing moneyz 💰
Sponsor your chef  , or join us in supporting the open-source projects we enjoy!
Contributing bugfixorz 🐛
Found a typo / error in a recipe? Each recipe includes a link to make the fix, directly on GitHub:
Click the link to edit the recipe in Markdown format, and save to create a pull request!
Here's a 113-second video illustrating the process!
Contributing recipes 🎁
Want to contributing an entirely new recipe? Awesome!
For the best experience, start by creating an issue in the repo (check whether an existing issue for this recipe exists too!). Populating the issue template will flesh out the requirements for the recipe, and having the new recipe pre-approved will avoid wasted effort if the recipe doesn't meet requirements for addition, for some reason (i.e., if it's been superceded by an existing recipe)
Once your issue has been reviewed and approved, start working on a PR using either GitHub Codespaces or local dev (below). As soon as you're ready to share your work, create a WIP PR, so that a preview URL will be generated. Iterate on your PR, marking it as ready for review when it's ... ready 
🏆 GitPod
GitPod (free up to 50h/month) is by far the smoothest and most slick way to edit the cookbook. Click here to launch a browser-based editing session! 🥷
🥈 GitHub Codespaces
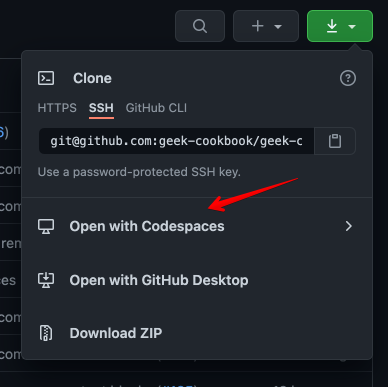
GitHub Codespaces (no longer free now that it's out of beta) provides a browser-based VSCode interface, pre-configured for your development environment. For no-hassle contributions to the cookbook with realtime previews, visit the repo, and when clicking the download button (where you're usually get the URL to clone a repo), click on "Open with CodeSpaces" instead:
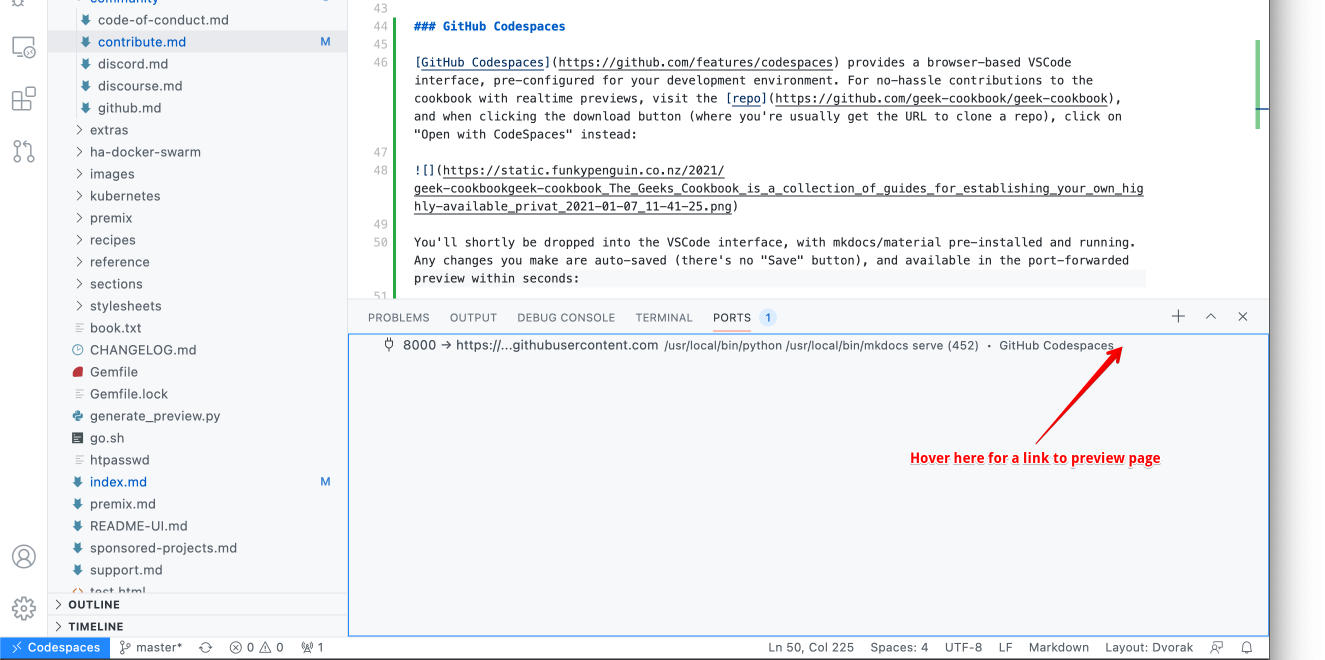
You'll shortly be dropped into the VSCode interface, with mkdocs/material pre-installed and running. Any changes you make are auto-saved (there's no "Save" button), and available in the port-forwarded preview within seconds:
Once happy with your changes, drive VSCode as normal to create a branch, commit, push, and create a pull request. You can also abandon the browser window at any time, and return later to pick up where you left off (even on a different device!)
🥉 Editing locally
The process is basically:
- Fork the repo
- Clone your forked repo locally
- Make a new branch for your recipe (not strictly necessary, but it helps to differentiate multiple in-flight recipes)
- Create your new recipe as a markdown file within the existing structure of the docs folder (see
docs/recipes/template.mdanddoc/recipes/kubernetes/template.mdfor examples) - Add your recipe to the navigation by editing mkdocs.yml
- Test locally by running
./scripts/serve.shin the repo folder (this launches a preview in Docker), and navigating to http://localhost:8123 - Rinse and repeat until you're ready to submit a PR
- Create a pull request via the GitHub UI
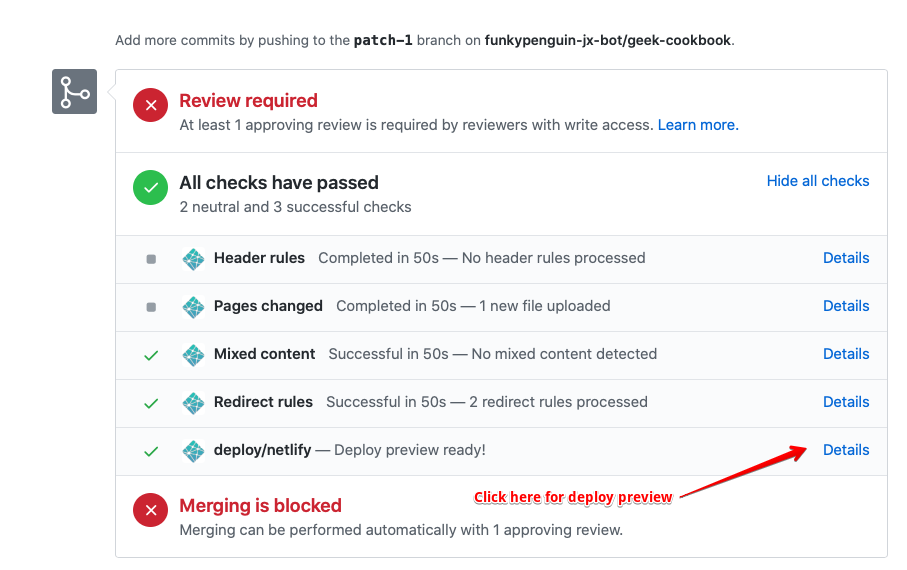
- The pull request will trigger the creation of a preview environment, as illustrated below. Use the deploy preview to confirm that your recipe is as tasty as possible!
Contributing skillz 💪
Got mad skillz, but neither the time nor inclination for recipe-cooking? Scan the GitHub contributions page, jump into Discord or Discourse, and help your fellow geeks with their questions, or just hang out bump up our member count!